Gifted Owl Web Technologies provides top-quality website design and support technologies, and our clients often ask us about how to add their own content to the WordPress sites we deliver. Here are some of the key steps to create, add content, and publish a blog post on a WordPress website.
Logging In and Finding the Dashboard
Start by going to your WordPress Dashboard. It can easily be found by adding “/wp-admin” to the end of “YourDomain.com,” so it will look like YourDomian.com/wp-admin.
If you’re not logged in already, it will take you to a login screen before displaying the Dashboard. If you’re already logged into your WordPress site, the link will take you to the Dashboard.
How to Create a New Post from the Sidebar
Once in the Dashboard, there are several ways to create a post. At the left sidebar, “Posts” should be one of the top options, as it’s usually immediately under the “Dashboard” option. Different WordPress sites will have different sidebar options, depending on what is installed on the site.
The Posts tab will show the most recent posts, and there are several ways to add new posts. Under Posts on the left sidebar, a drop down menu will offer options, including “Add new.” Also, there’s an “Add new” button next to the title “Posts” at the top of the page.
Other Ways to Make New Post
You don’t have to be on the Posts page to add a new post. On the top menu bar, find the “+ new” button and hover the mouse over it. A drop down menu will offer “Post” as an option, usually right at the top.
Similarly, hovering your mouse over the Posts tab in the left sidebar will also produce a drop down menu with “Add New” as an option below “All Posts.”
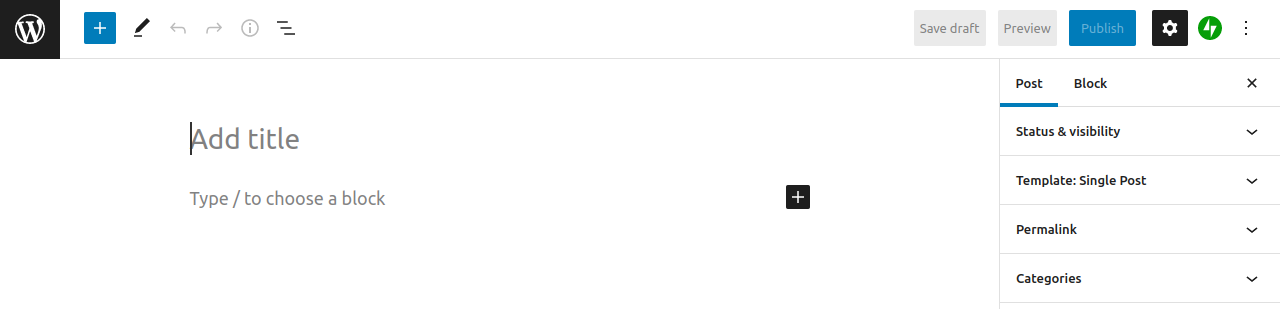
Adding a Title
Once at the New Post tab, your first option is to “Add title,” showing you where to put the title of your post. A post’s title can impact its SEO score, so consider length and word use when selecting a title for the post.
Building the Post’s Body Content
Under the title is the body of your WordPress blog post, where you will add content that can be presented and stylized in many different ways.
WordPress utilizes “blocks” to help organize content. Blocks allow you to separate different content types, like text, images, and video, and add formatting elements, like text wraps, backgrounds and columns.
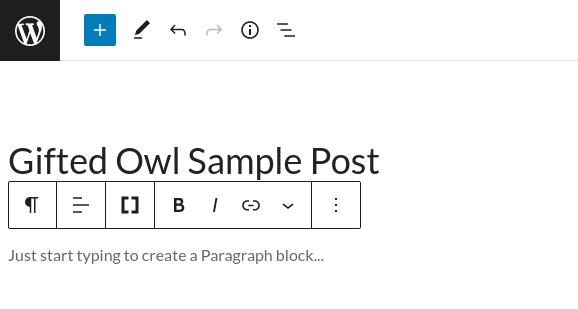
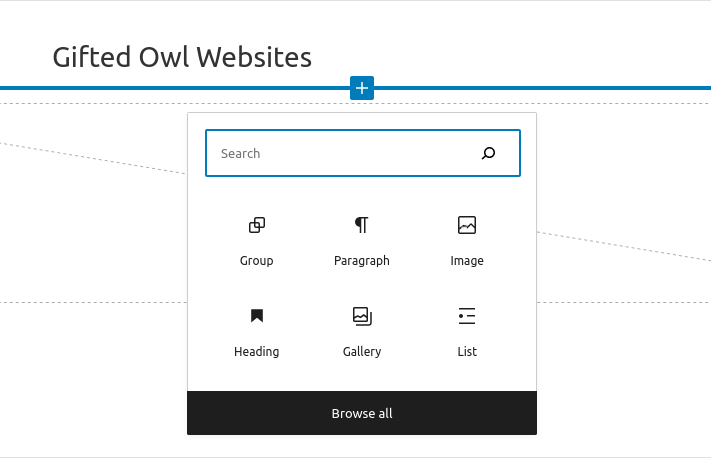
The post’s body already has one block ready to go, as all you have to do is start typing to add a Paragraph block, which is how most text is presented. Or, if you want to add images or other content, look for the Plus Sign on the right, which will display a number of options, many of which will depend upon what features are installed on your particular WordPress site.

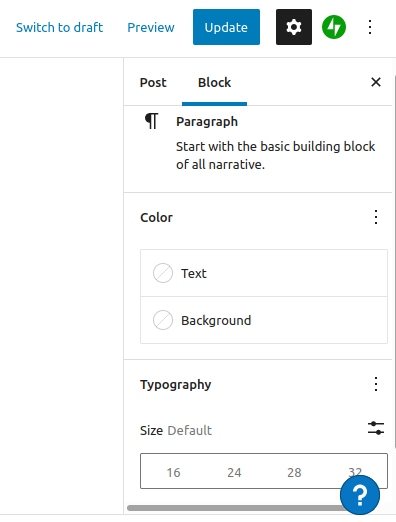
Settings Sidebar
While entering content blocks, opening the Settings Sidebar on the right can be useful for some users. The Settings Sidebar offers users the option to change details about either the Post or the selected content Block.
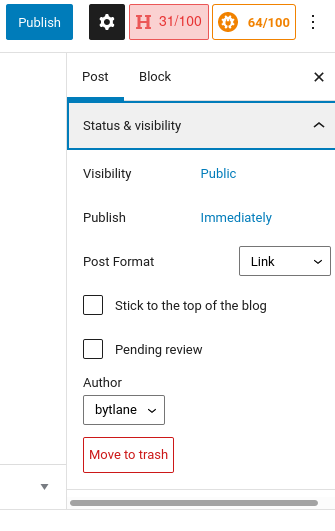
At the top of your draft WordPress post, to the right of the Publish button, is the Settings icon, which will bring up the Settings Sidebar to the right. When editing content blocks, the Settings Sidebar can be found through the Block Editing options menu under “Show more settings.”
Selecting Post or Block at the top of each setting allows you to adjust options. Post settings can include Status, Visibility, Date, Categories, URL Slug and more. Block settings over a variety of formatting and display options, including size, alignment, style, dimension and links.
Common Block Types
While a WordPress blog can offer numerous content options through a variety of content blocks, some of which are added to the base WordPress layout through installation of
Common to all WordPress platforms are the Paragraph, Heading, List, Quote, Image, Gallery, Audio and Video.
Paragraph is for basic text, where Headings offer you choices of six headline and subhead styles, ranging in size from H1 to H6.
List provides numbered and bulleted lists, while Quote allows you to display a piece of text in a specially designed format, which often includes bold or italic text and rule lines to delineate the selected text.
Know HTML? You’re one step ahead
If you already know the basic webpage programing language HTML, you will be familiar with some of WordPress settings, Additionally, HTML code can be inserted directly onto a WordPress post through the Code block.
Uploading Images & Video
Selecting Image allows you to put pictures into your post. WordPress allows users to upload images in five formats:
- .jpg
- .jpeg
- .png
- .gif
- .ico
After selecting the Image content block, there are three options for inserting an image into the post: 1) upload a file from your computer, 2) select a file that has previously been uploaded to your WordPress site through your Media Library 3) provide a website URL of an image.
Once an image is placed on the page, there are several options for how to display the picture. Selecting the block will bring up over the block an editing menu for the image that includes alignment, URL link, crop, text over image and duotone filter.
In the Settings Sidebar menu, which displays to the right of the post, there is the option to change the image size, dimensions, alt text, and display style.
Changing alignment, image size, dimensions and other settings offers great flexibility in designing a post, so feel free to experiment with the settings until you find one that looks good.
Got Plugins?
Want to expand your choices of content block? Plugins offer a world of opportunity to add new content and functionality to your WordPress blog. The Plugins tab on the right sidebar shows what is installed on your WordPress platform and the “Add New” options lets you search from thousands of available opinions and upgrades.
The Plugins page will offer information about each installed plugin, including the choice to activate or deactivate, as well as usage instructions and other details.
The Gallery content block allows you to display several images in one block. Like the Images content block, the Additional Settings menu on the Gallery content block allows users to adjust the size, display and layout settings of the selected images.
Video and Audio content blocks work similarly to Image blocks, allowing the user to either upload a new media file, link to a file online or use the Media Library to select a file that has already been uploaded.
The Video Settings menu options include Alignment, Autoplay, Loop, Mute, Playback Controls and Play Inline.
Video file types include:
- .mp4, .m4v
- .mov
- .wmv
- .avi
- .mpg
- .ogv
Audio Settings include Autoplay and Loop and WordPress Audio file types include:
- .mp3
- .m4a
- .ogg
- .wav
Like what you’ve got so far?
To make sure you don’t lose work, especially as you experiment with design, select the “Save draft” option at the top of the post as you progress with your work. In order to be saved, a post must have at least a title.
Want to see how it looks? Select “Preview” to get a look at how the page looks in Desktop, Tablet and Mobile modes. Selecting Preview in new tab will give a better view of how it looks displayed on a computer.
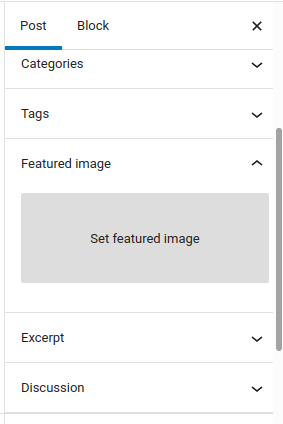
Adding Featured Images, Categories and Tags
Select Post in order to change settings associated with the post. Three key settings located here are Featured Image, Categories and Tags
WordPress blog posts often look better if a Featured Image is attached to the post, which often serves as a thumbnail image for the post on the WordPress blog page and a larger image at the top of the post.
Like the Image content block, the Feature Image selection allows users to upload an image file or select one from the Media Library.
Generally, Featured Images work best if they fit the size designated for the post. Most WordPress posts feature a standard, horizontally framed image size, but some WordPress designs can feature a custom image size for its Featured Image.
Standard WordPress Featured Image dimensions: 1200 x 628 pixels
Categories and Tags are ways to organize posts by content.
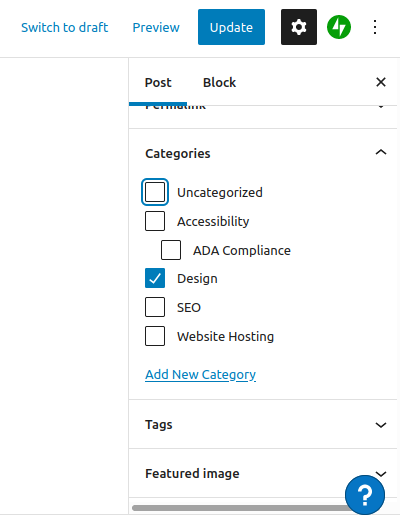
Categories are more broad and should be limited to a few main topics that cover the content range of the WordPress blog. Upon selecting the Categories tab in the Settings sidebar, a checklist of available Categories will display, as well as an “Add New Category” option.
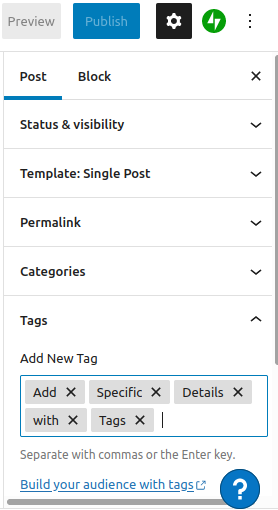
Tags are added more easily and help further guide blog users to specific content. In the Tags tab, simply type the desired tags, which are often very specific to the post and can include proper names of products, people, places and things, as well as other details that would separate that post from other posts within the same Category. The Tags tab also offers a “Most Used” option that displays some of the most relevant Tag options.

Publishing your post
While there are many options, functions and features available to you through your WordPress blog site, the steps listed above cover the basics, and you should be ready to publish your blog. Depending on your WordPress site’s design and SEO priorities, you may have other items on your blog’s checklist before publishing your post.
To Publish your blog post, select the Publish button at the top WordPress menu bar. A right sidebar will ask if you’re ready to post, showing options for Categories, Tags, SEO Checklists and other pre-publication priorities. If you’re ready, select the Publish button at the top of the right sidebar. If you have more work, you can select the Cancel button and continue editing your post.
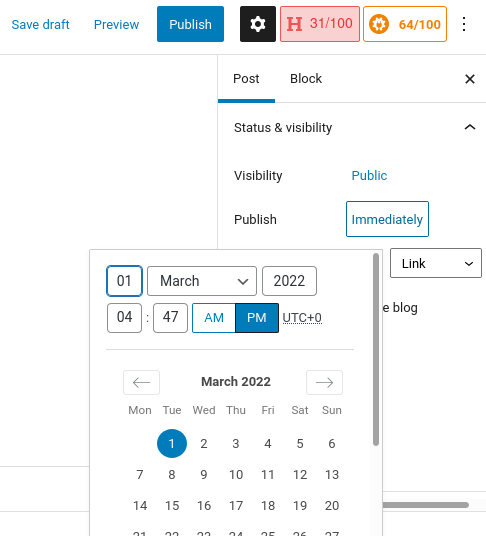
Also, if you’re ready to publish but want it to post at a time in the future, you can Schedule a post for publication. In the right sidebar after selecting the Publish button, look for the Publish option, which will likely read “Publish:Immediately.” Selecting the drop down menu option will display a Calendar and options to set the date for future publication.
Editing your WordPress post and details
Congratulations! Your post has been published. It should now appear as the top entry on your Blog page and be visible to visitors to your blog. But what if you discover an error, or need to change details, such as when the post’s publication date?
If there’s an error in the Blog Post content, it can be easily fixed simply by selecting the Edit Post selection at the Top Menu Bar.
Or, at the Dashboard, on the Left Sidebar, find the Posts selection to edit post details. The Posts page will show the Title, Author, Categories, and Date of each blog post.
Hovering your cursor over the Title of each post will reveal a drop-down menu that offers to Edit, Quick Edit, Trash, or View each post. Selecting Edit will take you to the Edit Post screen, allowing you to edit blocks, add new ones, delete content, or make any other changes.
Selecting Quick Edit gives users the option to change details about the post without going into the Edit Post screen. Details that can be changed through Quick Edit include Title, Date, Author, Categories, and Tags.
Quick Edit also offers to change the post’s Status, offering users the selection of Draft, Pending Review or Published. Selecting “Draft” from this selection is an easy way to take down a post that wasn’t quite ready to be published.
Learn your Blogs Functions
Outlined above are the most basic steps for publishing a post on any WordPress blog or website. However, as mentioned several times in this post, WordPress is a versatile and user-friendly Blog and Content Management System, offering many options for upgrades in functionality through Plugins, Themes, and other add-ons.
Be sure to get to know the capabilities of your WordPress Blog. For instance, many blogs may feature SEO tools that require additional information to prepare your post for publication, which could include adding a summary of the post, writing Alt Text for images, or adding other keywords or data.
Call Gifted Owl Web Technologies for your next website
Gifted Owl Web Technologies offers high-quality WordPress websites and website support. Our professionals can set up a website that meets your business needs and offers the website support to keep it up to date and working for your needs.